 Snow Globe Gift Wrap Image Credit: Kitchner Bain/iStock/GettyImages
The weather outside may be frightful, but this snow globe gift wrap idea is so delightful. Learn how to make a gift box that features a three-dimensional diorama of an idyllic winter scene. When you shake the box, the snow flies in the air and lands on the trees. The snow globe remains intact even when the gift inside is removed, so you can let it snow all season long.
Video of the Day
WATCH THE VIDEO TUTORIAL
Things You\’ll Need
-
2 two-piece collapsible gift boxes
-
Printed image of winter scene
-
Artificial pine branches
-
1 sheet clear plastic
-
Iridescent confetti
-
Glue stick
-
Hot glue gun
-
Hobby knife
-
Ruler
-
Craft glue
-
Duct tape
-
Gift wrap
-
Tape
-
Twine
Step 1: Purchase Gift Boxes
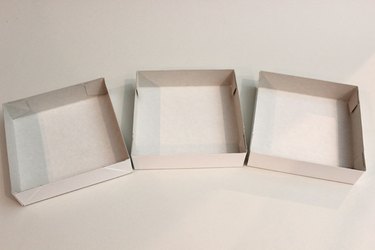 Start with three box lids. Image Credit: Jonathan Fong
To create this gift wrap project, you will need 2-piece collapsible gift boxes – the ones that look like two box lids that slide into each other. You will actually need three of these box lids, so purchase two 2-piece boxes. You will have an extra lid left over for future use.
Step 2: Turn a Photo Into a Snow Globe
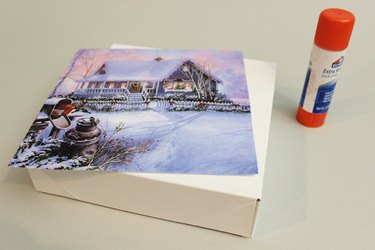 Adhere a snowy image to a box lid. Image Credit: Jonathan Fong
Start with the first box lid. Find an illustration or photo of a wintry scene. Print it to the size of the box. There are many images on the Internet you can use, or if you want to see your house in a snow globe, take a photo of it on a snowy day and print that out. Cut the image to fit the box lid and adhere it with a glue stick.
Step 3: Add Some Depth
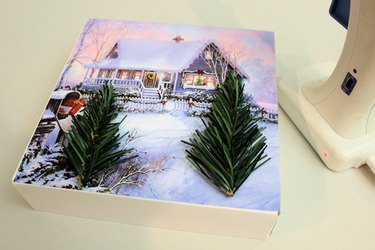 Hot glue miniature trees to the box lid. Image Credit: Jonathan Fong
To add dimension to the image, hot glue two miniature artificial pine branches to the foreground of your image. You can purchase wreaths or boughs of artificial pine at crafts or hardware stores during the holidays. Just cut off a few inches of the branches with wire cutters. Use scissors to trim the branches so they have a triangular tree shape.
Step 4: Cut the Cover
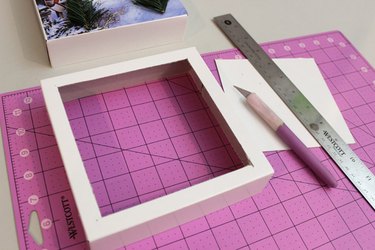 Cut an opening with a 1/2-inch border in the second lid. Image Credit: Jonathan Fong
Cut an opening on the second box lid, leaving a 1/2-inch border on all sides. Use a ruler as a straightedge and a hobby knife to cut the hole.
Step 5: Add a Window
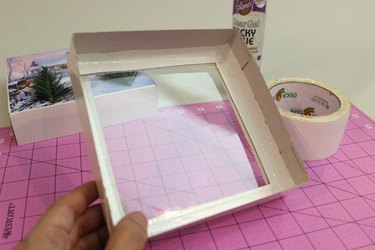 Cover the opening with clear plastic. Image Credit: Jonathan Fong
Turn the second lid over and glue a piece of clear plastic to the inside of the box, covering the opening completely. Duct tape the sides as well where the plastic meets the box so that this area is completely sealed. For clear plastic, you can use overhead transparencies or clear plastic report covers. In the example in the photo, upcycled clear plastic packaging was used.
Step 6: Add Your Confetti \”Snow\”
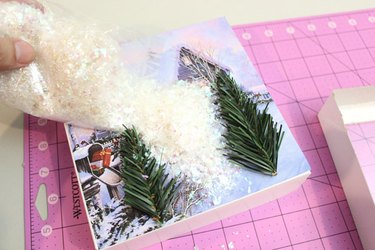 Pour confetti onto the tableau. Image Credit: Jonathan Fong
Pour a mound of iridescent confetti onto the three-dimensional tableau. The confetti looks just like snow, and the iridescent flakes add sparkle. Confetti is available in party supply stores.
Step 7: Assemble the Lid
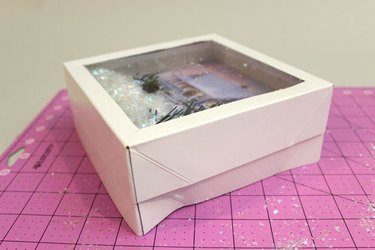 Slide the clear plastic box lid over the other. Image Credit: Jonathan Fong
Now slide the box lid that has the clear plastic opening over the box lid that has the tableau. At this point you can shake the snow to see if you have too much or not enough.
Step 8: Seal the Lid\’s Edges
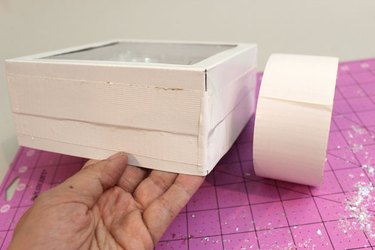 Seal the edges with duct tape. Image Credit: Jonathan Fong
Using duct tape, seal the edges between the two box lids, so there\’s now one lid made from two. Also, the duct tape helps keep the snow from escaping the diorama.
Step 9: Choose Paper to Decorate the Box
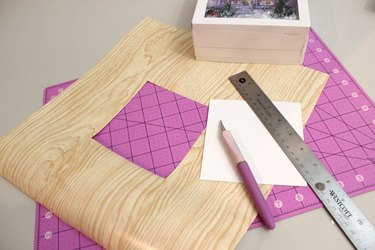 Cut an opening in the wrapping paper. Image Credit: Jonathan Fong
Rather than leaving it white, you\’ll want to wrap the box in decorative paper. Cut a piece of wrapping paper that will cover the entire lid, and in the middle cut an opening that is a 1/2-inch smaller than the opening in the lid.
Step 10: Wrap the Lid
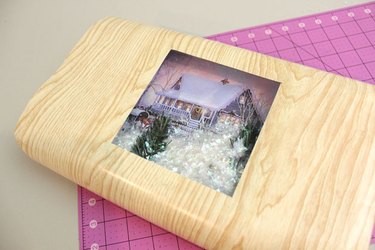 Tape the wrapping paper to the box. Image Credit: Jonathan Fong
Position the opening in the wrapping paper over the opening in the lid. Tape the paper to the box.
Step 11: Wrap the Box
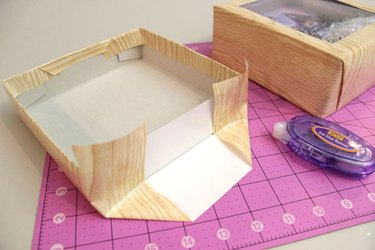 Wrap the bottom piece separately. Image Credit: Jonathan Fong
Take the third box lid and wrap that separately so the top and bottom pieces can be separated without damaging the snow-globe section. Once both pieces are wrapped in paper, slide the top lid with the snowy tableau over the bottom lid.
Step 12: Box Your Gift
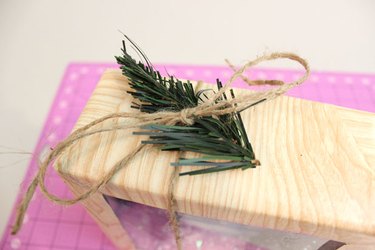 Finish the box with twine and an artificial tree. Image Credit: Jonathan Fong
After you place a gift in the box, secure the top and bottom lid together with some twine. Cut off an additional piece of artificial pine and tie a bow around it with the twine.
Warning
Use caution when using a hot glue gun, and always keep out of children\’s reach.
